Project: Redesigns of the CIO, CSO, and Computerworld homepage and header (and later, InfoWorld and Network World) as part of adding international editions to IDG’ in-house CMS.
Date: 2018-2019
Involvement: I was one of two front-end developers working on this project. Based on comps from our UX team (Zach Sullivan and James Kocik) and requirements from product manager Galen Gruman, I architected the homepage and header markup that would be shared across all brands, and built out the CIO, CSO, and InfoWorld redesigns myself. My teammate Joan Joly implemented the design on Computerworld and Network World using the markup I had laid out, and also masterminded the JavaScript behind the “edition picker.” Back-end work was courtesy of Jim Hutson, Sagar Patade, and the Webnish team in India.
Description: In 2018 IDG made the decision to bring many of its international websites onto our in-house, custom-built CMS, which already powered most of the US brands. These international brands would no longer be standalone sites; instead they would be “editions” of their core brand. (So, for example, CIO Asia became CIO’s ASEAN edition). This was a project termed “OneCMS.”
As part of this, a redesign of many brands’ homepages and header/navigation was necessary, as they would now need to display different content based on the edition the user chose, and much of that content would need to be slotted in our CMS by non-technical users.
Additionally, we wanted to move away from the model whereby each IDG brand had its own homepage markup, even though much of the code was duplicated across brands. Instead we wanted a shared homepage, where we could use the same markup for each brand, but “theme” it using its own CSS.
I was the principal front-end resource for CIO, the first of the brands to undergo the OneCMS experiment. I used this as an opportunity to set the tone for the project front-end, architecting the core structure of the new homepage and navigation according to the principles of Don’t Repeat Yourself and Separation of Concerns. I wrote most of the new markup, using a mix of HTML and JSTL (the templating language used by Java Servlet Pages).
As mentioned, a good chunk of the individual branding was accomplished through the good ol’ fashioned CSS cascade. But there were some things we couldn’t reskin with CSS alone, such as text content. (For example, each site has a different name, tagline, and list of footer links; these would not differ by edition). My organizing principle for this content was to use each brand’s “properties” file — an XML file containing brand-specific information, such as tagline, links to the logo images, social media info, API keys, etc — for anything that could not be shared between sites. While updating the properties file did require a code release, this seemed acceptable for content that would not change often.
We built the new homepages in parts, so let me discuss each one individually:
The homepage nameplate and primary navigation on CIO.
Homepage nameplate: this sits above the primary navigation, displaying the brand’s logo and a coordinating background image, color, or color gradient. It is only displayed on the homepage, and not any inner pages of the site. It is also not displayed at the mobile breakpoint.
This was the first part of the new homepage I built, and I was still figuring out what I could handle in the CSS vs. what I needed the properties files for, so this is built such that the logo, background image, background color, and background gradient (optionally) are set in the properties files, and inserted into the page as JSTL variables. While the logo pretty much has to work this way, as it’s inserted as an <img> tag, the other properties could have been done with CSS alone. This is a change I would make if I had to refactor this, in the interest of not having to interpolate JSTL variables into a <style> tag (which breaks the principle of Separation of Concerns).
The logo also needed to be able to adjust to a range of browser widths without a loss in fidelity, so we used lossless SVG files and percent widths rather than static pixel values. Since the nameplate is not used on the mobile view of the site, we only load the large SVG at tablet widths or higher. (This is accomplished solely with CSS media queries; no JS is necessary).
Finally, the nameplate uses the relatively new position:sticky CSS declaration. This allows the primary navigation to appear to move over it as the page is scrolled.
Primary navigation on CSOonline.com
Primary nav, mobile view, CSOonline.com
Primary navigation:
The primary navigation on OneCMS brands sits between the homepage nameplate and the main content of the page when the page is loaded. As the user scrolls down the page, the nav covers the nameplate above it, and eventually fixes at the top of the viewport.
At desktop breakpoints, the primary navigation displays the site logo, the edition picker, Insider login/registration controls, a button to open the megamenu (see below), a button to expand the search window, and a menu of site- and edition-specific links. At tablet breakpoints, the links are dropped; at mobile breakpoints, only the logo, edition picker, and megamenu button remain.
The Insider controls are designed so that a logged-in user will see different content from a logged-out or unregistered user. This is done by setting an Insider cookie whenever a user logs in, which is read when the page is first loaded.
Megamenu:
Top Stories:
Trending bar:
Top Stories Promo:
Editorial promos:
“Crawl” (Content List):
Sponsored Content Promo:
Resources module:
Ordering: Since the entire homepage is built using Flexbox, we are able to take advantage of the order property on Flexbox items in order to change the order of elements on the page without affecting their order in the DOM. This was useful because we wanted to allow editors to reorder content on the page.
While a great idea in theory, it worked less well in practice, due to a few concerns. One was that we lacked a UI for editors to change the order of elements on the page, and didn’t have the resources to build one out. So we had to resort to a raw HTML slotting module where they would actually have to tinker with the CSS to change the value of the order property. While every attempt was made to make this user-friendly, in the end the decision was made that we would hide the ordering slotting module from editors, only to be touched by Engineering and UX.
The second concern was simply that, if an order property is not explicitly set on a flex element, it defaults to zero. Elements with 0 weight are sorted by their order in the DOM. The only negative value for order with any meaning is -1; every other negative number is treated as a -1. This meant that either every element had to have an explicit order property, or it basically displayed in DOM order. Since the editors would be setting only the weight of individual elements — not every one on the page — this meant we had to set the order property explicitly in the codebase. Setting an order property for every element on the page in CSS was tedious, and ended up causing some unexpected results. (The order of the elements on the current websites is not entirely as designed!)
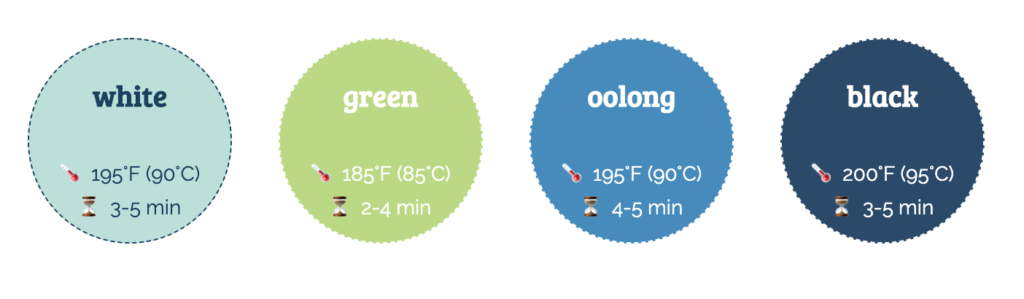
Description: As a personal enrichment project, I decided to create a tea timing web application. This would allow you to select a type of tea (green, black, white, etc) which will automatically set a brewing time and display the brewing temperature. The user could then adjust the time up or down in increments of 10 seconds or 1 minute. An alarm plays when the timer is done.
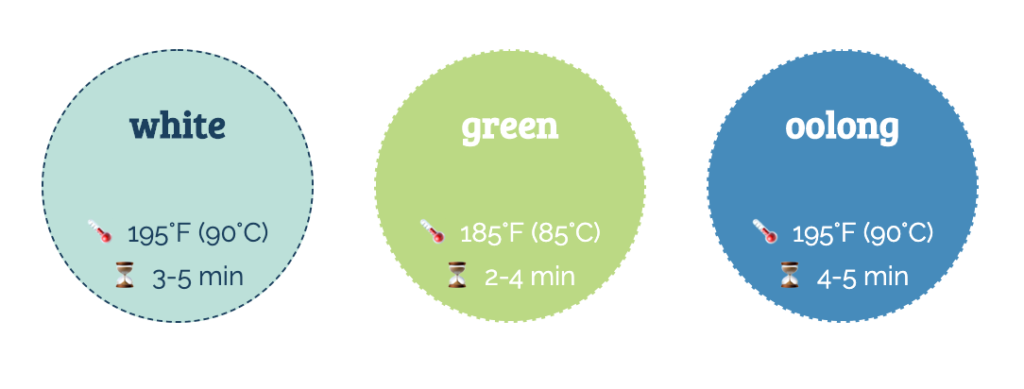
Technologies: HTML, CSS (including Flexbox), vanilla JavaScript. No images are used; just emoji, which are HTML entities. The tea buttons were created with a combination of border-radius:50% and the padding-top aspect ratio hack to maintain the same height and width despite Flexbox’s… flexiness.
Status: Live
Potential improvements:
Allow users the ability to add a tea, and store it using their local storage
Use Sass or Stylus for CSS
Visual effects – border that changes color? (per iOS timer)
Caveat: since I haven’t touched this since 2020, I’m unlikely to get to it any time soon!
Additional Notes: Right now this is deployed as flat files FTPed to hosting space. Might set up as a Netlify site (or similar) for build/deploy/hosting in the future, but probably not until I move my blog to a static site generator.
Involvement: I was the principal front-end developer on this project, as part of my role as a senior front-end developer at IDG. UX team member James Kocik designed the comp, according to the requirements of Mark Lewis, manager of IDG’s Insider products. As this was a clone of an existing site, minimal back-end work was required.
Description: InsiderPro is IDG’s first paid subscription site, and its design is modeled after other sites in IDG’s portfolio, i.e. CIO. Therefore most of my work was “theming” — adjusting the site styles on top of the base HTML that all such sites use.
The article gating, subscription offer, and login/account management functionality were implemented using third-party Piano’s Composer, VX, and ID tools, with some extra custom JavaScript on our end. The goal of total experience was to encourage users to sign up for a subscription plan, and to only allow them to read full articles if they had subscribed. The Piano experiences were piped into our site via iframes, and thus I also needed to work in Piano’s web interface in order to bring the HTML/CSS into line with InsiderPro’s branding.
Technologies:Front-end: HTML, CSS (including Flexbox), JavaScript, JQuery. Back-end: Java, JSP, Struts, running our custom in-house CMS. Third party: Piano’s Composer, VX, and ID tools.
Status: I no longer maintain this, but the site is still live and using the same design and code.
The top of IDG’s InsiderPro homepage, showing the hero with the top stories.
Lower down the InsiderPro homepage, showing trending topics, the featured promo module, and the top of the crawl (list of all content by date)
Showing the “megamenu,” a large, full-page menu unique to each IDG site and edition.
The subscription page. The offer section is brought in via Piano, and unique branding styles and markup were added by me.
The login modal window. The login functionality is provided by Piano’s ID product, but is styled by me.
Involvement: I was the principal front-end developer on the initial site build, as during my time as a senior front-end developer at IDG. James Kocik was responsible for UX and comp design for this site. The structure of the site is based off other sites in the IDG portfolio, eg. TechConnect. Mostly my work was on the homepage; the articles and category/tag index pages retained the look of other IDG sites. As a clone of an existing site, no back-end work was required.
Description: GameStar was created as IDG US’ first game-focused site, using a recognized brand name from IDG Germany. The design was based off the contemporaneous design of TechConnect (which no longer uses the same design).
The top of the page shows a typical three-article hero of featured content, slottable by IDG editors. The content list below it is populated in reverse chronological order. This “crawl,” as we termed it, uses CSS Flexbox to display 2-3 columns of equal height boxes. Each box presents the title, description, and primary image for that article; the primary image uses CSS cropping to display the images at a 3:2 aspect ratio, allowing them to maintain their native ratio but remain a consistent height.
An integrated ad unit is also included in the flexible design, as well as a sidebar with a list of recent “DealPosts” (affiliate revenue-generating posts).
Technologies: HTML, CSS (including Flexbox), JavaScript, JQuery. On the back-end, Java, JSP, Struts, running our custom in-house CMS.
Status: I no longer maintain this, but the site is still live with the same design and codebase.
The top of the GameStar homepage, showing the hero and an ad unit.
The homepage body of GameStar, showing the content list.
The top of a GameStar article, showing the headline, dek, and social sharing buttons, as well as a sticky ad unit.
Body of a GameStar article, showing a sidebar ad unit and the GameStar color palette
Time is an illusion, and time in JavaScript doubly so.
This is the start of — hopefully! — a new series for me, “TIL in front-end web development.” In case you have never been exposed to it before, “TIL” stands for “today I learned.” I believe the term has its origins on Reddit, that wretched hive of scum and and occasional hilarity.
My purpose with this series is to chronicle what I’m learning in my personal front-end development enrichment projects — which I suddenly have a lot more time for, thanks to unemployment. I’ve been doing this work for 10+ years professionally, but I still learn something new every day; every day I’m Googling something I don’t know, or some topic I need a refresher on.
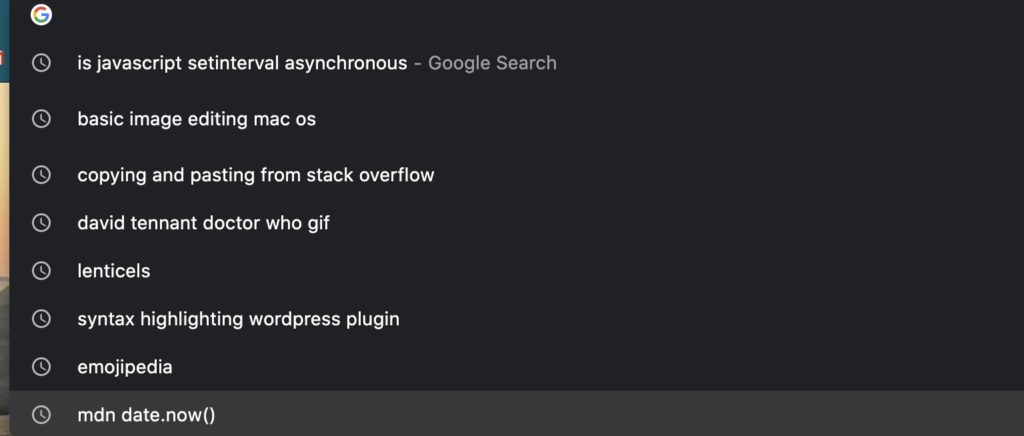
Some of the things I searched for while writing this blog post. I’ll leave it as an exercise to the reader which are related to this blog post, and which aren’t. “Lenticel,” for example: hot new JS framework, or part of a plant?
Without further ado, let’s talk about timers.
“Don’t lie, you’re crying because you have been coding (timers) in JavaScript.” Surprisingly few tears were shed in the making of this blog post! (The meme is CodeHub’s, but the red text is all me).
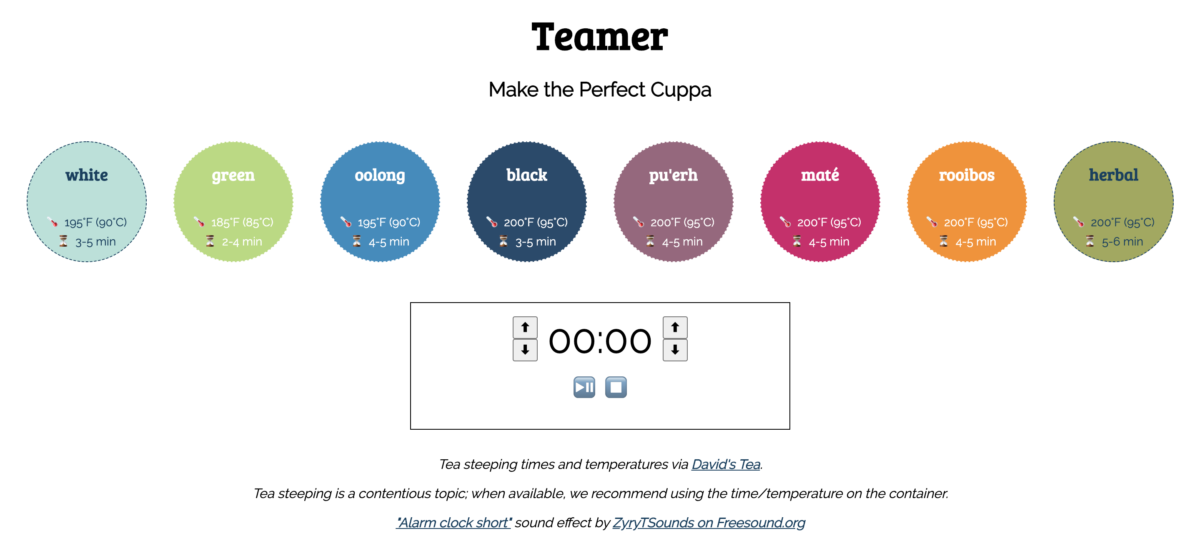
Brew tea as long as you want, as long as it’s five minutes
My most recent web development enrichment project has been Teamer, a tea timer webapp built using only HTML, CSS, and vanilla JS. Between that, and a code challenge I did for a job interview recently, I felt like I was thrown into the deep end of the “I write algorithms not event handlers” pool.
(“I write algorithms not event handlers” is clearly the next hit single from Panic! At the Disco).
Teamer started very simply, with just a series of buttons corresponding to each tea. When you clicked one, it would start a timer using the brewing time ceiling for that tea.
Like so. In the original iteration, if you clicked on the pale blue circle corresponding to white tea, you immediately started a five minute timer.
In this version, there was no possibility for adjustment. You wanted white tea, you got a five minute timer. That’s it. It wasn’t the most friendly user experience, but it was fine for a first pass.
(There are plenty of tutorials, Codepens, and JSFiddles out there about building a basic timer, but did I look at any of them? I did not. I knew I would learn it better if I had to figure it out myself).
The basic tea timing algorithm
Fundamentally, the timer algorithm is:
Set the timer: set the visual display of the timer as minutes and seconds, and save it in milliseconds somewhere. (Where this value is saved varied between versions. Currently it’s stored as the value of the play/pause button). Logically enough, this is a function called setTimer();
Calculate the starting time in milliseconds. This uses the Date.now() method, which returns the current time in UTC/Unix epoch format, i.e. the number of milliseconds since 12:00am, January 1st, 1970. (Why 1970, I don’t know; I don’t make the rules. Maybe one day they’ll give me Tim Berners-Lee’s private number and I can call him up in the middle of the night and ask him questions like this).
Calculate the deadline — the point at which the timer will stop — by adding the milliseconds from step 1 onto the Unix start time from step 2.
Start ticking: Using the setInterval()method, “tick” every second (1000ms) until the deadline.
On every tick: update the visual display as well as the current milliseconds, and compare the current milliseconds to the deadline .
Once I had that working predictably, I decided it was time to break everything add some user controls.
User controls = extra complication
(Matt saw me writing that title and said, “You’ll soon learn that users are the enemy”).
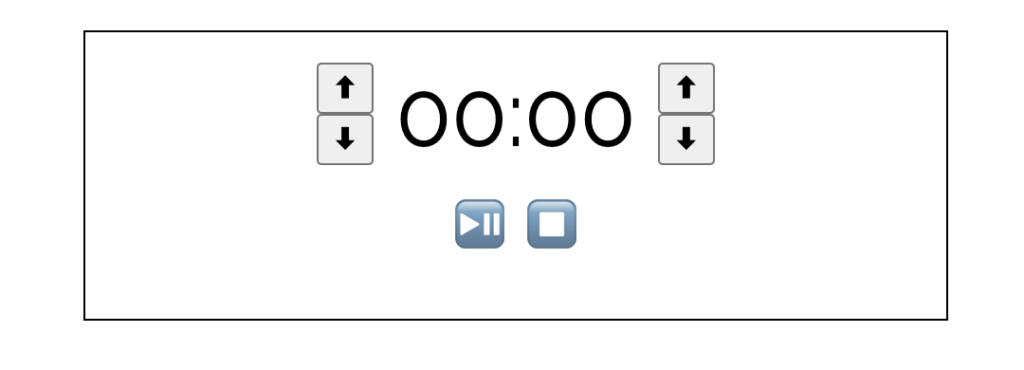
For the next iteration, I wanted to add a few new buttons: play/pause (that would allow you to pause and restart the timer), stop (that would stop the timer and set it to zero), and buttons to increment or decrement the timer by one minute or ten seconds.
That’s when things got complicated.
For one thing, I had to separate some of the logic from setTimer() out into a new playTimer() function. Previously, the timer started as soon as you selected a tea; now, I wanted the timer to start only when the user hit the play/pause button. So this necessitated some refactoring.
This is also where I created tick(), breaking out an anonymous function inside setTimer()/playTimer() into a named function that I could run with setInterval(). This function was designed to hold all the things that had to happen each time the timer ticked down — everything in step #5 above.
Using a combined play/pause button also meant that I had to keep track of the toggle state of the button, which I did with a playing Boolean variable.
Incrementing/decrementing necessitated a probably-too-clever switch() block based on the value attribute on each increment/decrement button:
       switch (parseInt(btn.value)) {
            case 60:
                deError();
                setTimer(mins+1, secs);
                break;
            case -60:
                if (mins === 0) {
                    setTimer(0, 0);
                }
                else setTimer(mins-1, secs);
                break;
            case 10:
                deError();
                if (secs > 49) {
                    setTimer(mins+1, (secs+10)-60);
                }
                else setTimer(mins, secs+10);
                break;
            case -10:
                if (secs < 10 && mins === 0) {
                    setTimer(0, 0);
                }
                else if (secs < 10) {
                    setTimer(mins-1, (secs-10)+60);
                }
                else setTimer(mins, secs-10);
                break;
        }
You can see that as well as resetting the timer, it handles some corner cases around converting from base 60 to base 10, i.e. when you reach 59, you need to roll over to zero, not 60. Also in there is logic to prevent you from setting the timer to negative numbers.
(I’m embarrassed to admit how long I swore at this switch() statement, which seemed to be doing zilch on my first pass — no timers were being set. Then I realized that the btn.value was coming in as a string, and thus it wouldn’t enter any of the cases — cases inside a switch() block always have to be integers. JavaScript’s wibbly-wobbly typing strikes again!)
Feeling self-satisfied with my work, I pushed my code to my website and added it to Codepen. But then I noticed two other problems…
Take one down, pass it around… three gnarly Javascript bugs on the wall!
The two three problems are found were this:
The timer was occasionally displaying as “:60” instead of “:00.”
Adding time to a timer while it’s running causes the timer to become All Fucked Up (a technical term).
Remember #1?…
The importance of being earnest (to the rounding method you choose at the start)
Debugging problem #1, I quickly realized it had nothing to do with the tortuous switch() block — that was your first thought, too, eh?
However, I was concerned by the logic to calculate the remaining time on a timer — part of the tick() function, called every 1000ms. It looked something like this:
       if (end > now) {//time hasn't elapsed yet
            let diffMs = end - now;
            let diffMin = Math.floor(diffMs / 60000);
            let diffRemSec = Math.round(diffMs % 60000 / 1000 );
            setTimer(diffMin, diffRemSec);
        }
(It actually wasn’t nearly as neat, because at this point I hadn’t yet figured out how to use the modulo operator to remove the minutes I had already accounted for. I highly recommend this Stack Overflow answer for the smarter way of doing things).
(Also no idea why I’m using let for those three variables that I’m never reassigning. I guess I’m still not 100% used to the ES6 assignment keywords).
You may notice this disconnect between the Math.floor() method I’m using for diffMin and the Math.round() method I’m using for diffRemSec. Surely that may cause some weirdness, right? Plus there’s nothing stopping from Math.round() from rounding up to 60; I’m not doing any base-conversion math like I am elsewhere. I also couldn’t remember why I had chosen Math.round() instead of Math.floor() — so, ultimately, I changed it to Math.floor().
Good news: I no longer saw “:60” instead of “:00”.
Bad news: the timer was now skipping numbers. (This is bug #3, alluded to above). Most noticeably, when you started the timer, it went straight from “:00” to “:58.” It would also occasionally skip numbers down the line.
I tried a bunch of different solutions for this. Applying one Math method, then another (no dice). Testing for that “:60” case and manually resetting it to “:00.” (That caused a slew of other issues). None of these really did what I needed them to do.
The basic problem was:it’s correct to use Math.floor(), but the visual display of that data is incorrect.
Time is an illusion, and tea time doubly so.
Having ruled out rounding error, the conclusion I came to regarding the cause of the skips was: the code in tick() took some non-zero amount of time to execute. Thus each measurement was being taken at 1000ms + 5? 10? ms, which over time would lead to drift.
Give that, I asked myself: can I run tick() more frequently?
Before I dive into that, allow me a minor digression to talk about metaphors. (What can I say, I’m a word nerd as well as a nerd nerd).
The concept of a “tick” comes from an analog clock with hands, where each second is a movement of the hand of the clock, making a click or tick noise. If you speed up the ticks of an analog clock, you get a clock that runs fast; it will ultimately become so out of sync with Observed Time ™ that it becomes meaningless.
From my trip up the clock tower of Bath Abbey when I was there in November 2019. We were warned extensively not to touch the 18th century clock mechanism, as there was a very real risk of changing the time for the city of Bath.
But that metaphor doesn’t transfer perfectly to our timer, does it? If you speed up the ticks, all that happens is the display is updated more often.
“Really, Lise?” Really. I know it doesn’t sound right, but bear in mind — what ultimately determines when the timer ends is the deadline in milliseconds. That never changes, no matter what you do on each tick. And both the deadline and the current milliseconds are grounded in Unix time, which is as official as it gets.
So what’s left? The visual display. There’s real math happening behind the face of this clock, so the updates will always be accurate to the current Unix time. But if the user sees skips in the sequence, they’re not going to trust that it’s accurate.
Here’s where I’m practicing my UX design skills. Because the conclusion I came to is:
What’s most important to the user experience is the illusion that the timer is counting down at a rate of 1 second per second, with no gaps.
The human brain can’t tell the difference between 1000ms and 990ms.
So that’s what I landed on — tick() is run every 990ms instead of every 1000ms. Like so:
ticker = setInterval(tick, 990, deadline);
Relatedly, I want to take a moment to add: making setInterval() a function expression in the global scope is crucial, so that you can use clearInterval() to stop your timer. The assignment snippet above lives in playTimer(), but it’s first declared near the top the JS file with let ticker. (See, that’s the right usage of let!)
Anyway, I tried a few different intervals, but I still saw skipping with 999ms, and with numbers below 990, I often saw flashes of the same number twice (as the display was updated with an identical number).
(You will see those once in a blue moon even with 990ms, but it’s not super noticeable. If I decide to add a CSS transition to the numbers, I might have to account for that — maybe setting up a control block that only updates the number if it’s different from the immediately previous number?)
Once again, JavaScript allows me to pretend I’m a Time Lord.
Who does number two work for?
I didn’t forget bug #2 (inc/decrementing a timer while it’s running causes weirdness), I promise! Although I did set it aside temporarily while I dealt with JavaScript’s timey-wimeyness.
I found there were a couple of things going on here:
Problem the first: the deadline was not being updated to reflect the new deadline. When you added/removed time without going through the click handler on the play/pause, you were never invoking playTimer(), and thus never setting a new deadline. So if you added a minute to a 3-minute timer, it would look like a 4 minute timer, but in the code it was still waiting for a time three minutes in the future.
So, I should explicitly invoke playTimer() after my big ol’ switch() block, in the click handler for the increment/decrement buttons, right?
But hold on, what if the timer is already paused? Then I’d be doing it twice; once at the end of the block and once when the play/pause button is clicked. I definitely don’t want to set the deadline or change the playing state twice.
So this is was my first iteration:
        if (playing === true) {
            playTimer(); //if timer is running, run playTimer() to update the deadline; otherwise it will update when the play/pause button is clicked again
        }
That fixed the “resetting the deadline” issue, but in classic debugging fashion, raised a new problem: now the timer would flash between the old time and the new time. Wtf?
I eventually figured out I had to stop the ticker (with clearInterval(), in the stopTicker() function) before starting another one. I’m guessing this is because every time you run playTimer(), you create a new instance of ticker; they each have their own closure with the same starting values, but then they diverge based on the differences in the environment at the times they’re run. You get the flashing behavior because the two different tickers are trying to modify the same DOM element, like two children fighting over a toy.
… but my understanding of the inner working of JavaScript and closures is imperfect, so take this analysis with a grain of salt.
Anywho! This worked fine:
        if (playing === true) {
            stopTicker();
            playTimer(); //if timer is running, run playTimer() to update the deadline; otherwise it will update when the play/pause button is clicked again
        }
In Conclusion: What I Learned
I’ve finished all the time juggling for my tea timer app (for now, she says, ominously), and now I’m working on adding more features. An alarm when the timer ends? Using localstorage to allow users to add custom teas? Heck, maybe I’ll even add the ability to have multiple timers running at once, as an excuse to work with classes in JavaScript.
But to summarize what I learned about timers in the process of writing Teamer:
Date/time math is easier with modulo.
User control makes everything more complicated.
Sometimes the answer to “why doesn’t this razzlefrazzle work?” is “you need to parse it as an integer.”
Be consistent in your rounding methods, and always use Math.floor() when working with time.
If you want to stop your setInterval(), you need to tie it to a function expression in the global scope.
Just because your timer is meant to update every second, doesn’t mean it needs to update at precisely that interval — the illusion is more important than the truth.
Honestly, timers are a solved problem, and if I were doing this for any purpose other than my own edification, I’d probably go with the time-tested approach of copying and pasting from Stack Overflow.
I never run out of uses for this image.
I still maintain that working with JavaScript is like being a Time Lord — you get to work with a lot of wibbly-wobbly timey-wimey… stuff.
I wanna meet someone who was born at midnight on January 1st, 1970, just so I can give them the nickname “UTC.”
If you want to see the current iteration of the code with highlighting ‘n stuff, it’s up on Codepen.
And that is already way longer than I ever intended this post to be. Hopefully it is useful to someone other than future!Lise.