Or: It’s Not Easy Been Green
Or: A work in progress
As I wrote about earlier, I recently had cause to create an orc shaman costume for an NPC role in Madrigal 3. When staffer Griff contacted me to request I play this role, this might have gone through my head:
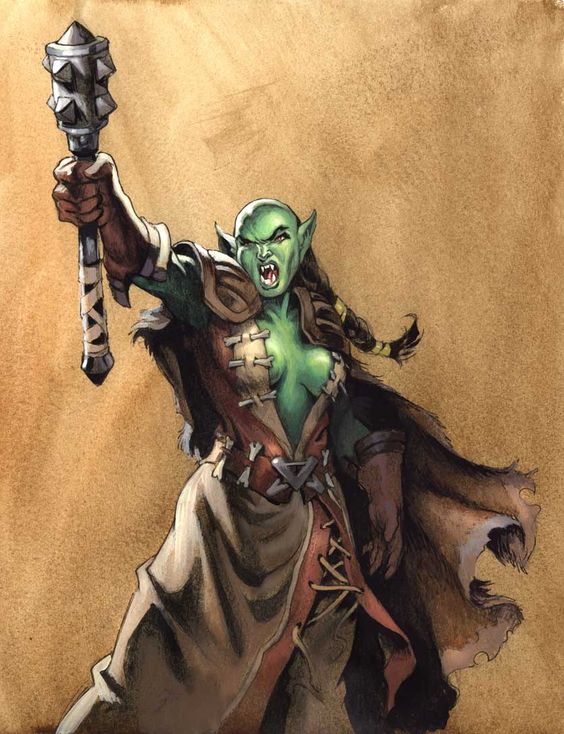
Original concept art for an shaman from the World of Warcraft boardgame. Maybe the game itself; I don’t recall and vanilla WoW was a long time ago.
Okay, okay, the orcs of Aerune are not Warcraft orcs. But let’s be real — there were gonna be some similarities. And I’d been wanting to make a costume like this for yeeeeears.
This is what I ended up with:

(Better pictures as I improve the costume and take more)
Let’s break it down by piece.
Skirt
Most of my work went into this. I wanted something that looked like scraps of leather roughly hewn into a garment, and I had only a month to work, so I headed for my favorite place for fast and cheap costuming: Savers. I literally bought almost every piece of leather or pleather that seemed like it might work. This included:
- a black pleather skirt with a faux snakeskin front panel
- a grey pleather jacket, well-worn
- a black suede skirt
- a tan suedecloth skirt with interesting cutwork
- a black leather jacket
- a copper-and-blue leather-look vest
Not all of these made their way into the skirt. Mostly, what you see here is:
- panels from the black suede skirt, decorated with strips cut from the cutwork suedecloth skirt,
- the arms, and strips from the front of, the grey pleather jacket, some decorated with faux fur, and…
- the snakeskin panel from the black pleather skirt, arranged over a suede panel and some faux fur to create an interesting centerpiece.
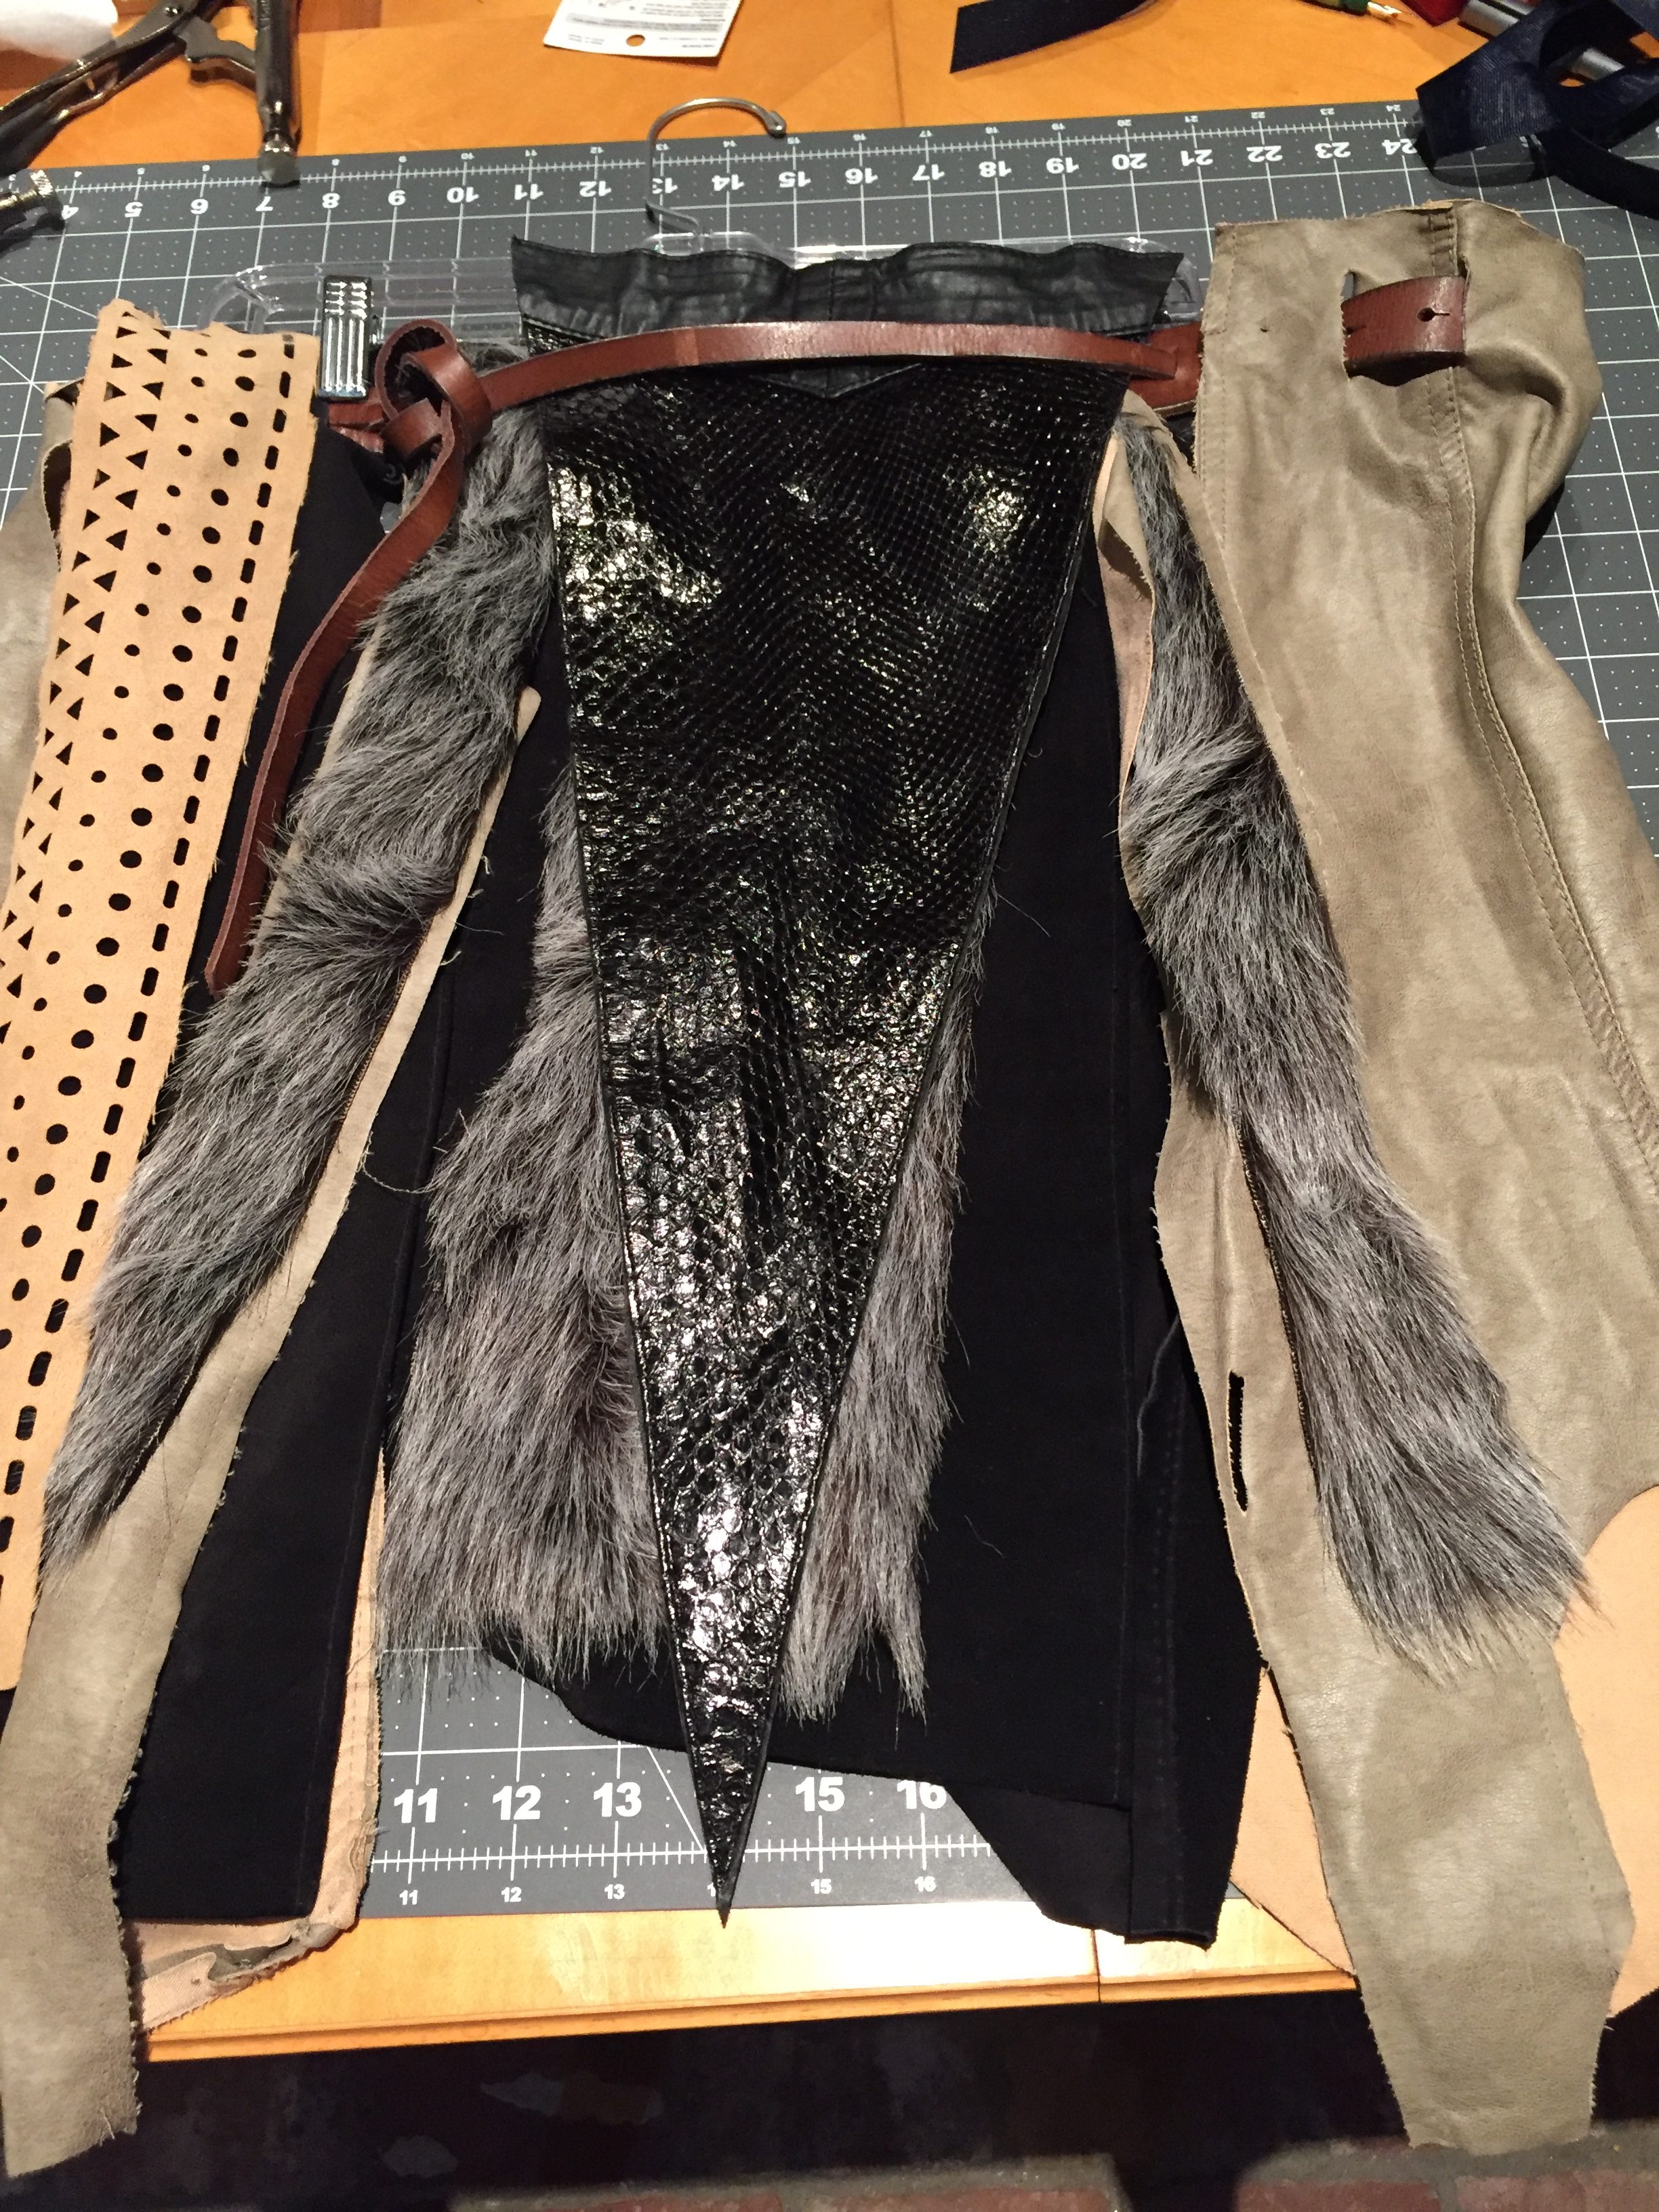
The belt was one with an interesting tie detail I purchased from Target. The faux fur is actually stuff I had lying around from an old cosplay. I put slits in each of the panels near the top, and slid them onto the belt. Once the belt was on my waist, I arranged them where I wanted them, tying the tie portion of the belt over the centerpiece.
I tried to hot-glue the panels into place once I had them where I wanted them, but hot glue doesn’t work so well on leather (and my husband leaving it in the hot car for a few hours probably didn’t help). Oh well! It doesn’t provide full coverage, of course, but I wasn’t expecting it to do that — I still wear shorts underneath.
The top
… was entirely improvised, because my first choice plan didn’t come together.
See the original orc lady picture? And her boobtastic leather jerkin? (Jerkin, heh). I wanted to do something like that. Short on time, I tasked my husband with removing the arms from the black leather jacket, and adding grommets so it could lace up the front.
Well, the result was cleavage-baring. It, uh, also looked more like fetish wear than it did something a hard-working orc shaman might wear. (The color probably didn’t help — tan leather = tribal, but black leather = motorcycle gang or dominatrix). The only Earth Shock involved would be my boobs exploding out of it.
(Since this blog is mostly PG-13, you won’t be getting picture of that).
So, in a pinch I found a white T-tunic I had once made that wasn’t doing me any good any longer. I cut most of the length off it, and cut off the arms, until I had something that looked like a sleeveless shirt. No hemming, because orcs don’t need hemming. It still looked entirely too clean, though, so I soaked it in coffee for about 6 hours and then washed it, which left it a nice off-white. The olive cake makeup I was wearing added further grime to it, which is all to the good, as far as I’m concerned.

The vest
… was actually a piece I made for the weekend-long game Once Upon a Time in Tombstone. You can see it on the Old West’s derpiest ranger here:
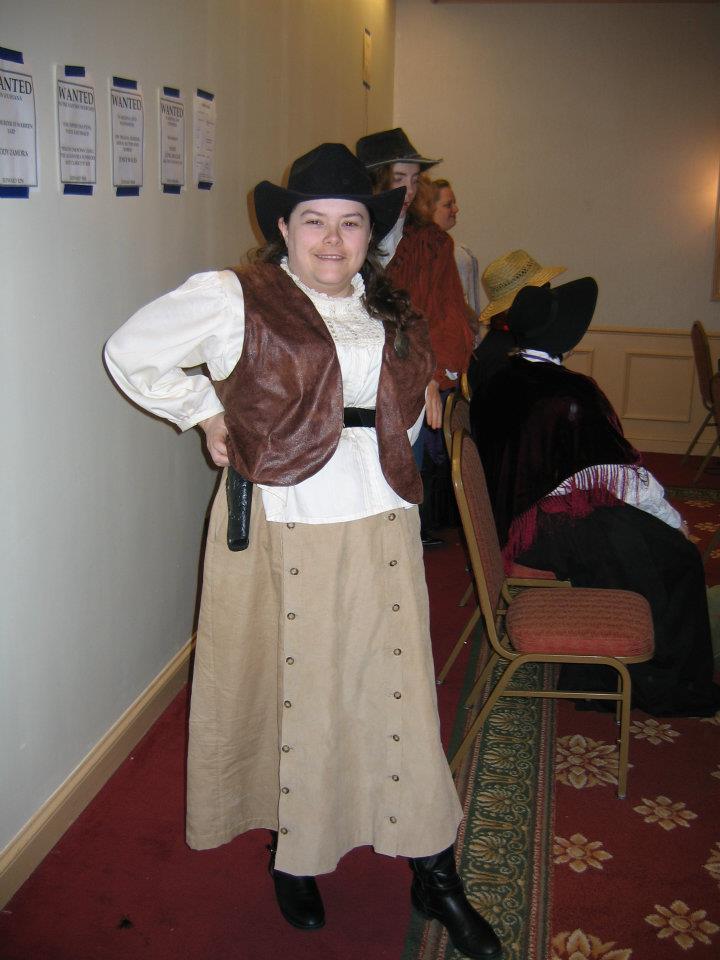
I considered using the copper-blue vest, which fit better, and sure didn’t look like fetish wear, but it still looked too modern to my eyes.
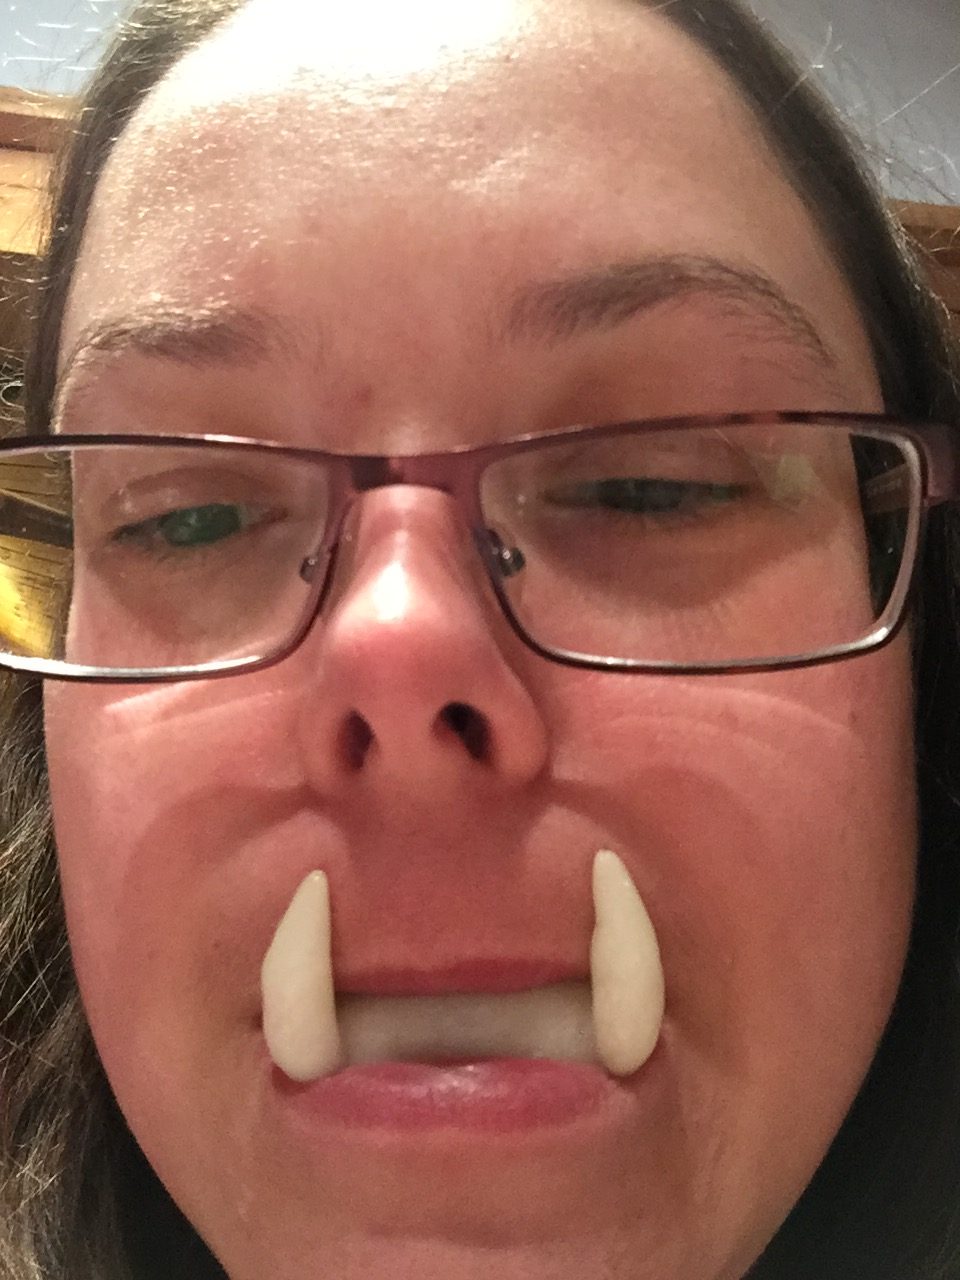
The teeth
I used this tutorial on using moldable plastic to make orc teeth.
This was my first time working with moldable plastic beads (I opted for InstaMorph, which was available on Amazon Prime in large quantities), and I didn’t know what to expect, so let me say just a few words about it as a lesson.
Moldable plastic (with brand names like InstaMorph or Friendly Plastic) is sold in bags of hard beads. When you drop the beads in hot water (~170 degrees Fahrenheit), they get soft and clear, and become moldable. The material dries white, but you can paint or dye it just like hard plastic at that point.
There was a lot of trial and error in this part of the costume — good thing I got a larger bag than I actually needed! Part of the problem is, the tutorial doesn’t really tell you how much material to use, and I kept using way too much. Protip: if the material smooshes over your palate when you try to make the mold of your front teeth, you’re using too much.
After I made a base I liked, I made the teeth. And then tried to attach them.
This is where I learned that bogglingly, the heat gun I own has a lower setting than my hair dryer. Trying to warm up the base with my hair dryer, I succeeded in nothing more than a) blowing all the materials around my work table, b) ruining the base. So if you’re going to do this, I recommend investing in a real heat gun.
Eventually I got a pair of teeth that I was happy… ish with, and dyed them with coffee overnight. I say “happy-ish” because these were far from perfect. They cover my palate too much, so I talk with a serious lisp. (It’s hard to be threatening with a lisp). Also the teeth need to be angled farther out, so that they don’t rub up against my lip.
Being green
Most of my green skin, as you can tell, is not paint. Thank god for that, because I did not want to spend all evening painting myself green.
Both my arms and legs are covered with opaque tights — these, in the “smeraldo” tone, which is a word I’d never heard before ordering these. It must be Italian for “orc-colored” 😉
(I’m someone’s Jade Princess, I guess)
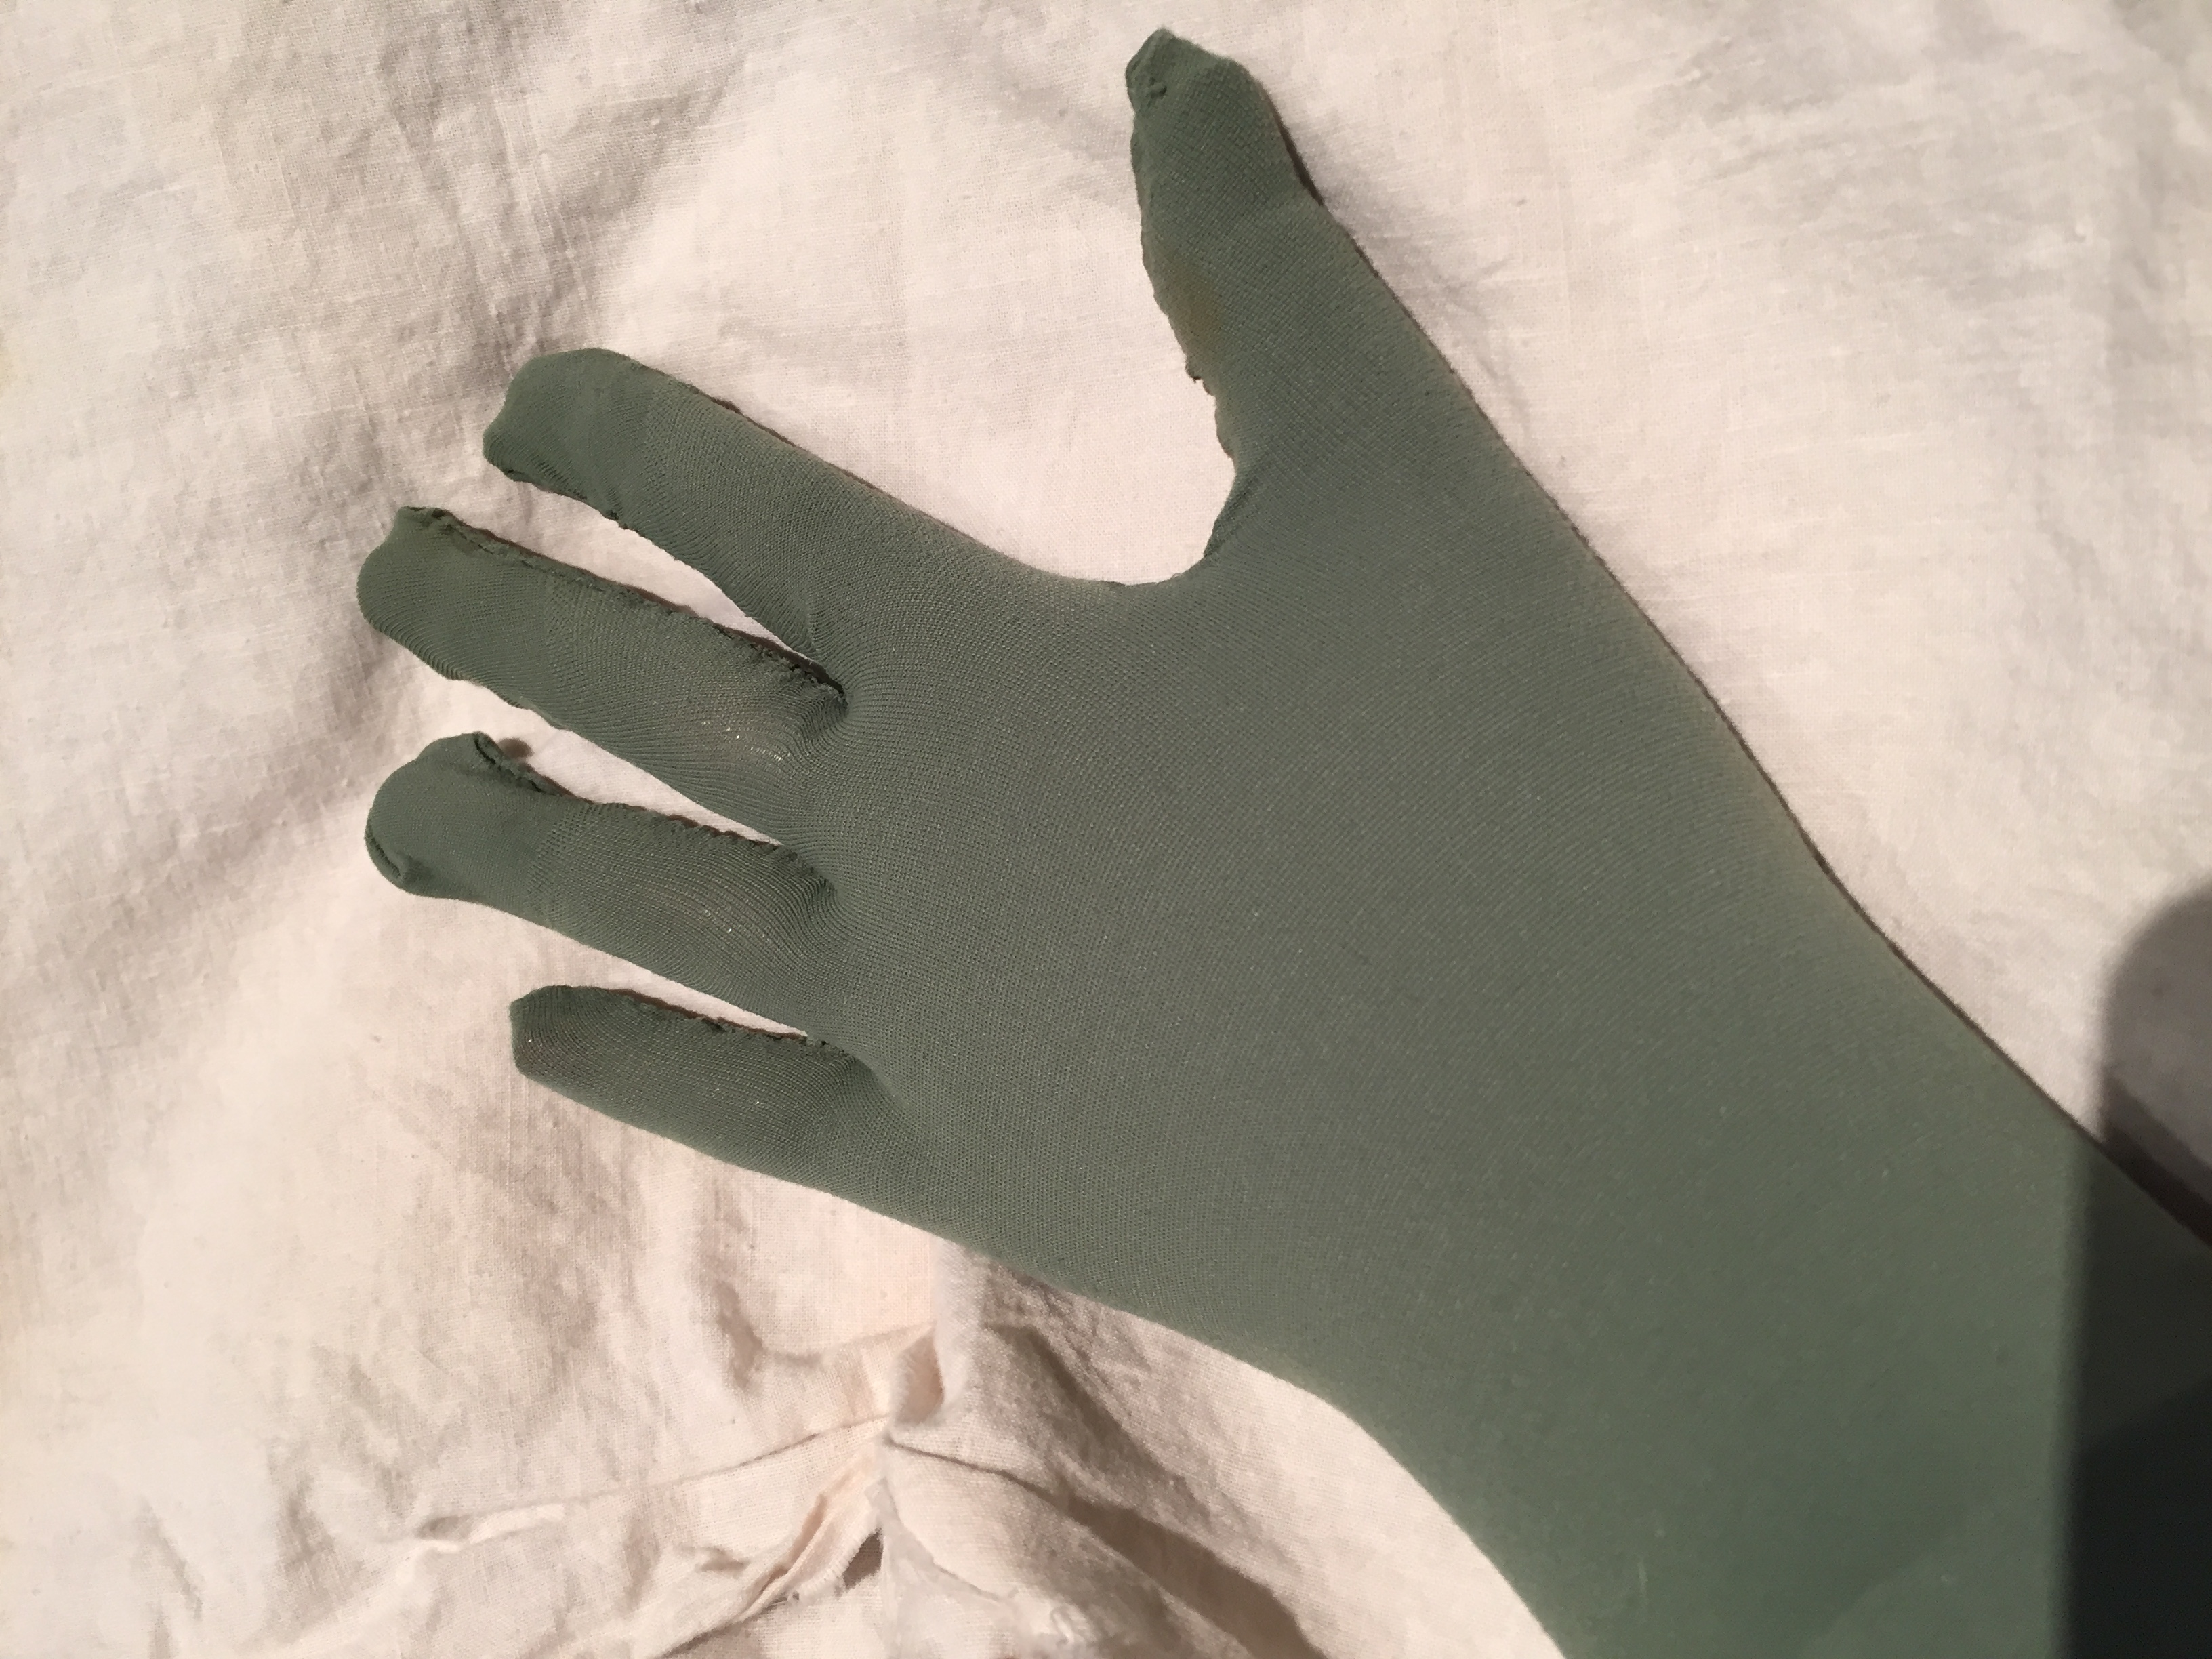
For the arms, I used this Weeping Angel costume tutorial to make gloves out of opaque tights. I never got around to affixing nails to them, which is fine, because I was only ever seen in half-light. I also used Fray-Check instead of nail polish for securing the cut edges, as that was easier to find in my house and, I find, works better.
I ordered some Mehron cake makeup in “olive” to paint my face and exposed skin. As you can see, it’s not a great match. Flat green may have just been better. Or I could get a different shade of tights, I suppose, but there’s a lot more work in making a new pair of gloves.
Accessories
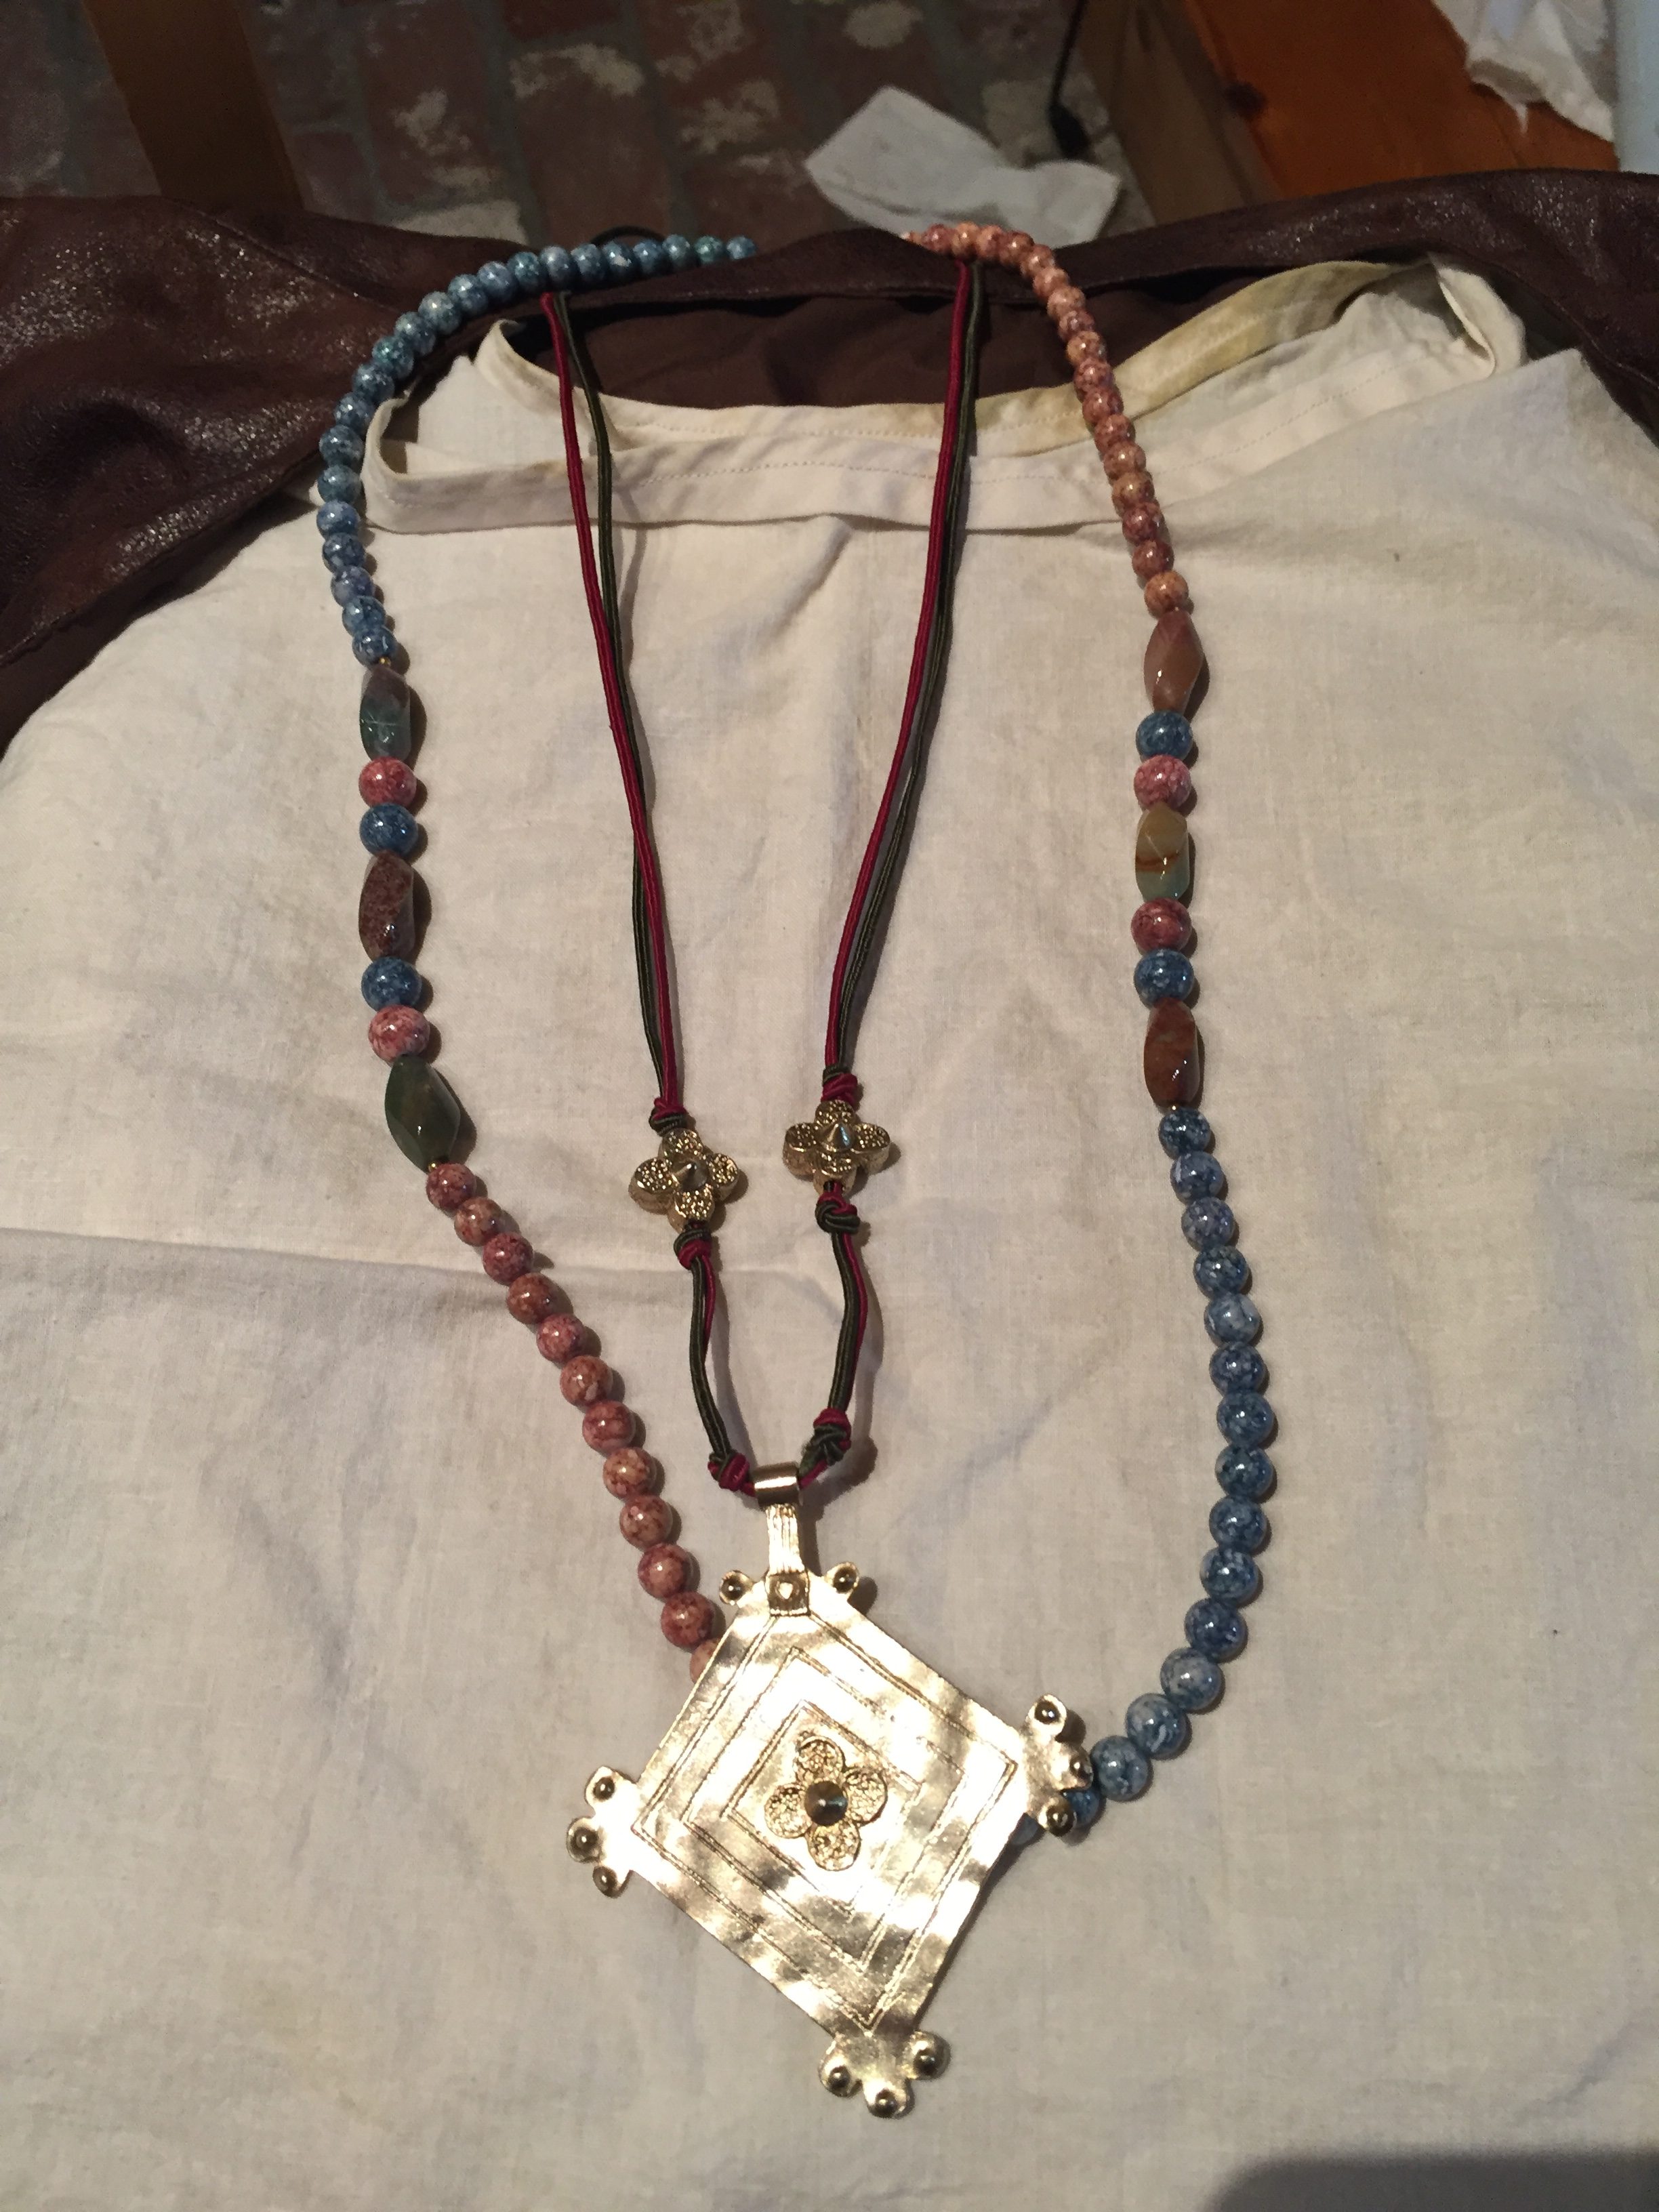
The jewelry I wore came from my costume closet — a set of coral and blue beads, and an amulet-like piece.
Sandals were, alas, just my dress sandals.
I collected a bunch of chicken bones to do the “bone-threaded-through-dress” look of the inspiration picture, but never got around to doing anything with them. They’re still in my fridge, though 😉
To-Do
As you can see, this costume could use a lot of improvements. Some of the things I hope to do to better it are:
- Color match the paint and the tights/sleeves better
- Adjust the sleeves to fit better (or make new ones — depends on how I decide to match colors)
- Add details and accessories, i.e. chicken bones
- Find better shoes
- Make better-fitting teeth
I hope this was at least somewhat interesting/useful in its current state, however!